

In our last blog post, we built out the walls, gave ourselves a nice lobby, and put the bouncer at the door. Everything is good to go and we’re safe now, right?
HA! This is the internet we’re talking about, and try as we might, there’s always going to be a potential for Sneaky McSneakster to get past the guard. So what happens when someone sneaks past, or the bouncer gets suspicious? That’s where the first layer of monitoring comes in – in this case, Azure Risky Users and Sign-ins, with a nice overlay of Defender for Identity.
Azure Risky Users/Sign-ins is like the guy watching the security cameras in a restaurant. He’s not stopping anyone at the front door—that’s the bouncer’s job—but he’s tracking who comes in, where they go, and whether someone’s acting weird. Maybe he’s checking badge logs. Maybe he’s eating a Subway sandwich. Either way, he’s your second line of defense and he’s the one looking for bad behavior because he really likes to yell, or maybe read Vogon poetry to a bad guy.
Other than Security Camera Guy, there’s his buddy in the basement—Defender for Identity (MDI). He’s keeping tabs on the old boiler rooms: your on-prem environment and hybrid workloads. He knows when someone’s trying to sneak through a service account or jiggle a few doorknobs that shouldn’t be touched, and he’s got a direct line to his upstairs friend, making sure that consistent and corroborative data is available to ensure a complete picture – and highlight when someone’s trying to pick a lock.
Say Hello to Security Camera Guy: The Guy Watching the Monitors
What does Identity Protection look like? From Microsoft’s documentation, we get this diagram:

It starts with insights – these can be detections, auto generated items, end user actions or behaviors, or any number of items. These feed into the risk, which is evaluated real-time. As the risks are generated, we grant secure access via policies in different ways. Sounds simple, right?
Azure’s Identity Protection components in these areas provide valuable insight in what is happening in your environment with your cloud/hybrid identities. They are pretty straightforward:
- Risky Sign-in: A specific sign-in flagged as suspicious for a specific user.
- Risky User: A user account flagged as suspicious because a few behaviors happened over time.
Let’s Put It in Context
To put this in perspective, Security Camera Guy is watching the monitor. He sees a visitor in the restaurant walk up to a door they shouldn’t go through and try the handle. That action is somewhat suspicious. Further review and behavior analysis show the person was really just looking for the restroom and tried to open the wrong door. No harm, no foul, everyone’s happy.
But then someone else shows up. They try the same door, but after not being able to get through they swipe a butter knife from the kitchen. Now they’re back, trying to jimmy the lock. That’s no accident. That’s intent, and intent is risk. Security Camera Guy sees all this and decides enough is enough. He radios in: “We’ve got ourselves a situation.”
In our real-world scenario, there are multiple detections as part of Risky behavior methods. They can come from several sources, including:
- Anomalies
- Impossible travel – that guy in accounting probably didn’t log in from Beijing, Costa Rica, and Kansas City at the same time.
- Unfamiliar sign-in properties – Joakim in HR has a Windows system and logs in from it all the time, but out of the blue, he is logging in from a Mac in a van down by the river.
- Leaked credentials – as part of analysis of findings on the dark web, threat intelligence, and other sources, user accounts that show signs of compromise based on intelligence can be marked as high risk.
- Sign-ins from Anonymous and Malware-linked IPs – You have a computer, and like to “keep things private” – so you decide to use a VPN to hide your identity as you connect to various sites. However, being a VPN service, the IP you’ve picked up was part of a malware campaign in the past, and it’s hiding your identity. You’re definitely getting a marker here.
- Integration signals (like from MDI) – All of the products have lines of communication. When those lines of communication provide consistent data indicating issues, the risk will rise.
Where Do I Find This Magical Data?
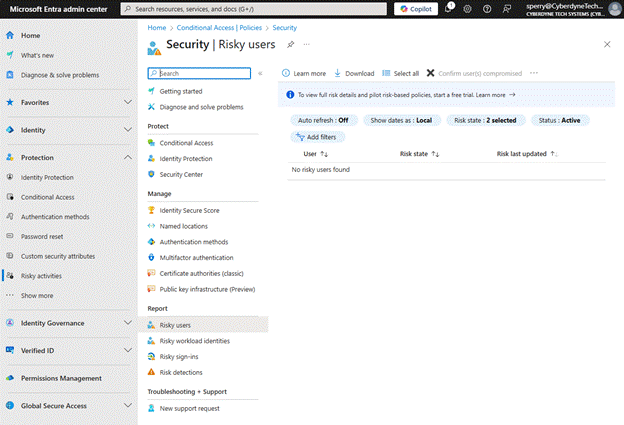
To see the Risky Users or Sign-ins in your environment, the best way is to go to your Microsoft Entra Admin Center.
Simply head to:
Protection Risky activities, and you’ll see reports for Risky users and Risky sign-ins, along with workload identities and Risk detections.
Risky Users
Once you select Risky users, you’ll notice you have several actions that you can take:

From the main dashboard your major actions are:
- Confirm User Compromised: This is self-explanatory. In this case, you’re saying this user was at risk, and you’re confirming that the risk was valid. This will start a series of events, including setting the user to high risk if they aren’t already, and triggering a detection, “Admin confirmed user compromised.” The user is considered risky until remediation steps are taken.
- Confirm User Safe: This action tells Azure to reidentify the behaviors of that user. For example, if your users typically login from your corporate office in Boston, and you implement a new tool, such as Zscaler, the logins will change. The learned behavior (i.e., this user generally comes in from Boston at 8AM) doesn’t match the change. Confirming them safe removes the risk and places the user back in learning mode. This would be used for false positives or a situation with an identifiable false positive.
- Dismiss User Risk: This action is taken on a regular, every day benign user risk. It’s a real risk, not malicious (think penetration testing). In this scenario, we don’t want the system to relearn user behavior, but we do want to remove the risk level from them. This resets the risk level without making additional changes.
You can use these from the dashboard to manage multiple users at once.
Clicking on a user allows you to drill into each identity for more information, as so:
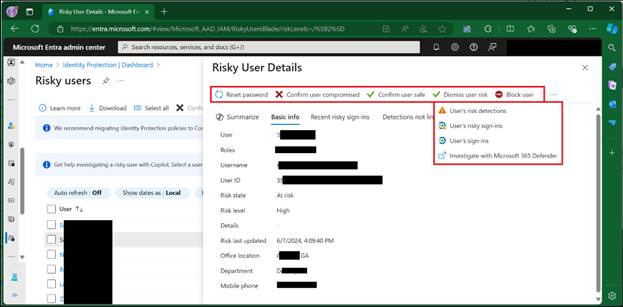
Here you can see basic information about the user, the recent sign-ins that led to the user risk being raised, detections not linked to risk, and as you can see, some additional actions.
- Reset Password: This revokes all user sessions, requiring reauthentication, and resets to the password to ensure a compromised user returns to control of their account.
- Block User: This action blocks a user from signing in until an investigation is completed and the risk is mitigated.
- Investigate with Microsoft Defender: This action takes administrators to the Microsoft Defender XDR portal to allow them to leverage Defender for additional investigatory tasks.
Risky Sign-ins
Risky sign-ins are single entry items for each user. As with Risky Users, you’ll go to the same Entra Risk area and select “Risky Sign-ins.”
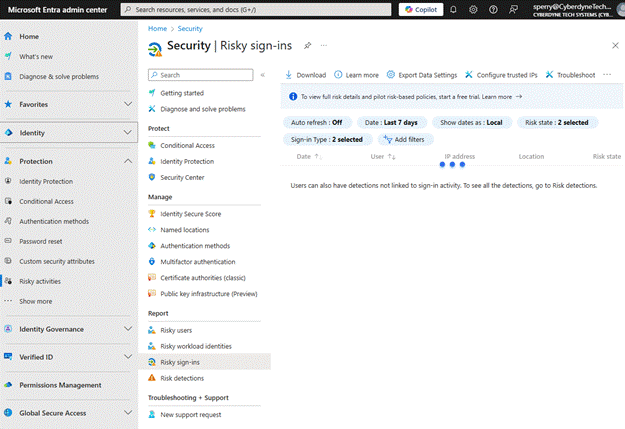
Similar to Risky Users, activities will be listed. For each sign in, you’ll be able to find:
- Sign-ins that are At Risk, already actioned on, or auto-remediated.
- Real-time and aggregate risk levels associated with these attempts to sign-in.
- Detection types, such as Impossible travel, Atypical travel, Entra threat intelligence, anomalous tokens, etc.
- MFA details (if the user performed it live, if it was handled as part of a token, etc.).
- Device information (what device were they on, was it corporate, OS info, etc.).
- Application information (what they were accessing).
- Location information (where it was originating from).
As with Risky Users, you can action on these by marking them as confirmed compromised, or confirmed safe, or you can dismiss the risk entirely. When you dismiss the risk, like before, it doesn’t change the behavior moving forward, it just eliminates the risk from that one detection now.
Risk Detections
These are more of an aggregation of risk reports, generally bubbled up higher than before. From here, initial investigations can lead back to user sign-ins, or to risky users in general. This will also provide more information, including the information about each detection, the attack type based on MITRE ATT&CK framework, other risks that may have triggered at the same time, more information about location, and a link to Defender for Cloud Apps to gather more information. This is just another way of reporting about the risks in the environment.
The Bouncer Gets a Second Chance: Fun with Automation
Well, our Security Camera Guy found somebody, hiding in the corner, trying to pry open an air vent to get into the ventilation system. We don’t know what they want, but we do know it’s not time for the ducts to be cleaned and we want them out. Remember our friend the Bouncer? Conditional Access gives us the ability to look at sign-ins and users and perform automated remediations. In essence, when Security Camera Guy radios down, “We have a situation,” the bouncer has an opportunity to kick the person out, or at least verify they should really be here.
By going to Conditional Access, like before, you can create a policy based on User or Sign-in Risk, as here:
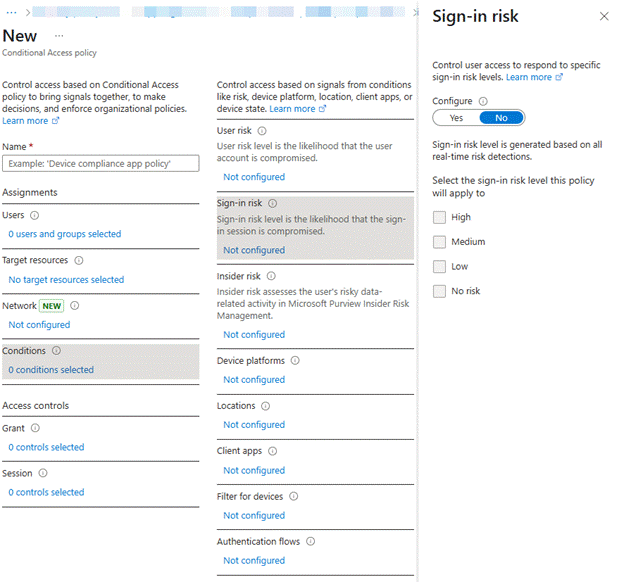
From here, you can turn on the configuration, specifically targeting your risky sign-ins. As a best practice here, Microsoft recommends targeting High and Medium sign-ins, and, as part of your future Grant controls, requiring another blast of MFA goodness, such as this:
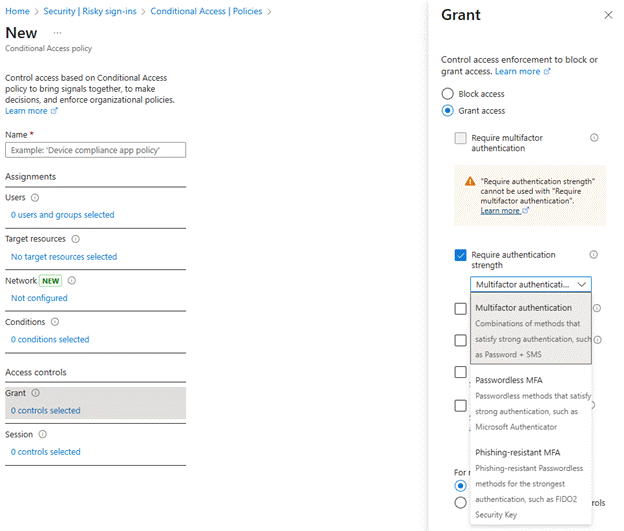
I prefer to require a specific authentication strength, as there is more control over what is allowed to count as MFA.
We can also target based on risky users, as here:
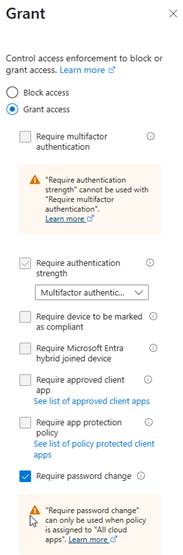
Note that, when you select “Require password change,” the option for “Require authentication strength” automatically selects. This is another part of the failsafe mechanisms to ensure that compromised users are handled in the most secure way possible. If a password reset is required, the bad actor would have to set up MS Authenticator and wouldn’t need to simply have an e-mail address or phone number compromised. It increases difficulty. The password reset utilizes Microsoft’s Self Service Password Reset functionality to accomplish.
Say Hello to Defender for Identity: The Guy Watching the Basement
So far, we’ve got our front door covered with Conditional Access, and our guy in the security office (Azure Identity Protection) is watching the monitors for shady activity. But what about the dusty hallways and service corridors that lead to the boiler room-aka, your on-prem infrastructure? That’s where Defender for Identity steps in.
Think of Microsoft Defender for Identity (MDI) as Security Camera Guy’s grizzled coworker. He used to be a detective, but couldn’t keep up with the changes. Now he’s a Private Investigator. He’s not just watching the door; he’s strolling around the back halls, checking the closets, and going, “Hmm, that domain controller shouldn’t be talking to that service account like that…”
MDI is designed to monitor on-prem Active Directory for suspicious activity – things like lateral movement, credential theft attempts, maybe a Pass-the-hash attack, or even just the ‘ol fashioned “somebody’s up to no good” behavior. The best part of him nosing around? All of these threat signals are getting sent back up to Security Camera Guy’s monitor, allow Azure Identity Protection to gather even more context to the Risky Users and Risky Sign-ins we talked about earlier.
Here’s what Grizzled Detective Man brings to the table:
- Suspicious authentication attempts – Did Bob from Accounting just try to use NTLM to access a file share he’s never touched before? Weird.
- Lateral movement detection – Attackers jump from system to system (or, in our metaphorical context, room to room) once they’re inside. MDI watches for this, and will radio in when someone’s creeping around like they own the place.
- Reconnaissance – That user pinging around every server on the subnet? Not normal. MDI knows it, and now you do, too.
- Sensitive group modification attempts – Someone trying to sneak into Domain Admins at 2:03AM? Yeah… We’re gonna go ahead and throw the red flag on that one.
And, just like that, you’ve got real hybrid visibility. MDI connects the dots between what’s happening in the cloud, and what’s happening on-prem. So, when something suspicious happens in AD, you have a way to take action – raising the risk level, triggering alerts, kicking off investigations with your SOAR platform of choice – you name it!
In all, it’s like having a second set of eyes watching the parts of your environment that attackers love to hide in. And, if you’re already running in a hybrid setup (and, face it – most of us are), MDI should be considered essential.
Best Practices & Pro Tips: Working With That Virtual Security Team
There are a few best practices and considerations here that I’d like to highlight. Some of it is Microsoft best practice, but some of it is just from plain, old-fashioned experience.
- Review risky activity regularly. Stay ahead of real issues and false positives.
- Tune alerting. Make sure the big stuff surfaces while the noise stays buried.
- Educate your users. Mistakes will happen — help them learn to spot danger.
- Automate with Conditional Access. Stop threats before they escalate.
- Use SOAR. Tie risky signals into automation workflows for response and escalation.
- Evolve your CA policies. Keep adapting to your environment and user needs.
What’s next?
We’ve built Conditional Access, uncovered what risky behaviors look like, and started watching both the cloud and on-prem parts of our house. But we’re just getting started.
Next up? We’ll dive deeper into additional tools in Azure and Defender XDR that can take your security game to the next level.
Thanks for reading — and keep an eye on that air vent!

Leave a comment